Last updated on May 21st, 2024 at 03:45 pm
Yoga establishes a connection between the mind and body. Practicing asanas, mudras, and meditation is an ancient art of achieving health, harmony, and well-being. Yoga includes postures (Asanas), breathing exercises (Pranayamas), and mudras that keep your body flexible and relax your mind. It also keeps you disease-free and reduces stress. Yoga comes with numerous health benefits. It strengthens muscles, relaxes the mind, promotes better sleep, and boosts overall body energy.
Today joint pain is a common issue faced by every age of people, in the present scenario, joint pain issues are not connected with older age persons even younger ones also suffer from this issue.
Joint pain and stiffness can be felt in one’s hands, feet, hips, knees, elbow, and spine, this pain may be short-term or constant sometimes it takes the form of chronic pain. It is very painful and uncomfortable and affects more than one joint, you feel stiff, achy, and sore. The person having joint pains feels a burning, throbbing sensation with unbearable pain and faces problems in movements and physical activity.
Do you suffer from joint pain?
But don’t worry yoga is effective and betters your joint pain. In this article, we suggest multiple poses help you get rid of joint pain and prevent the future risk of arthritis. These yoga poses are effective and sustainable helping you reduce joint pain and increase your life quality.
Can Yoga Help With Your Joint Pain?
Yes! Yoga is an effective way to treat and reduce joint pain easily, without wasting money on costly medication and surgeries, it is helpful in mild joint pains to chronic pain. It improves the mobility and functioning of joints, increases the flexibility of muscles and joints, and helps in early injury recovery.
Yoga poses can reduce pain and improve function and joint stiffness, these poses are optimized to address joint pain and make them pain-free. Doing yoga in the right, and appropriate way, these yoga poses can reduce joint pain, and strengthen, and flex the joint muscles.
Common Causes For Joint Pain
- Aging
- Obesity
- Arthritis
- Menopause
- Injury
- Too Much Physical Activities
- Reaction Of Drugs
- Bursitis
- Vitamin D Deficiency
- Osteoarthritis
- Longtime Stting Work
Benefits Of Yoga For Joint Pain
Yoga can combat and relieve severe joint pain, it is effective in reducing stiffness and swelling around the joints. Yoga offers multiple health benefits, there are many effective yoga poses that strengthen the muscles and joints, ease the movement of the joint, and relieve the chronic pain situation.
Various poses like bridge pose, plank pose, triangle pose, and many more poses will strengthen muscles, stretch the back and knees, improve joint flexibility and mobility energize the body. These specific yoga poses target the joint pain problem and heal it, reduce joint pressure, stabilize joints, and tone muscles of joints. Thus yoga plays an essential role in making your joints strong and pain-free.
Best Yoga Poses For Joint Pain Relief
1. Bridge Pose
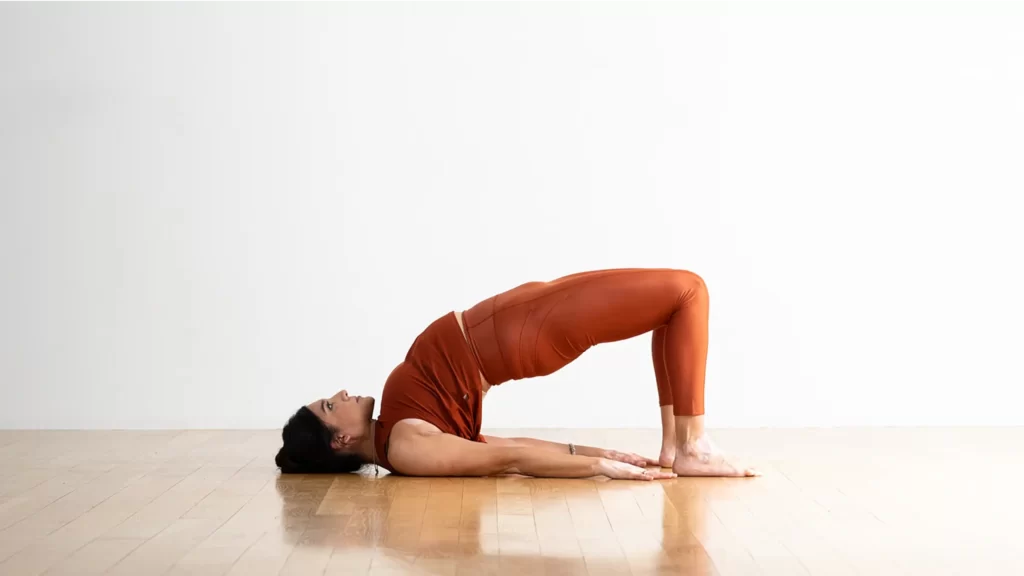
How To Do Bridge Pose
- Lie on your back with your knees bent and feet flat.
- Lift your hips towards the ceiling.
- Press into your feet and arms to lift higher.
- Hold for a few breaths.
- Slowly lower back down.
Muscles Worked
- Back
- Glutes
- Hamstrings
- Core
- Hip Flexors
2. Warrior Pose
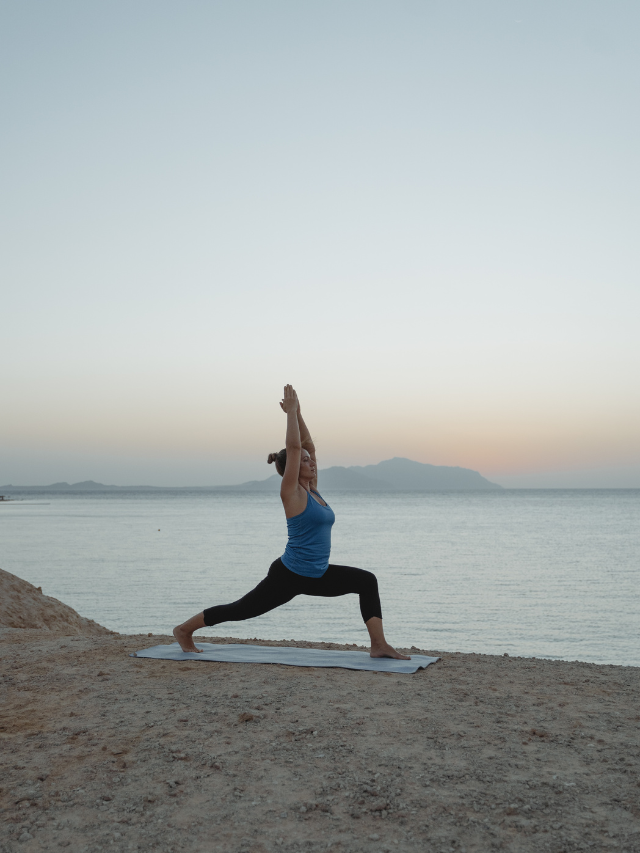
How To Do Warrior Pose
- Stand tall.
- Step one foot back.
- Bend the front knee.
- Extend arms out.
- Look forward.
- Hold and breathe.
- Switch sides.
Muscles Worked
- Quadriceps
- Hamstrings
- Gluteal Muscles
- Calves
- Core Muscles
- Shoulders and Arms
3. Forward Bend Pose
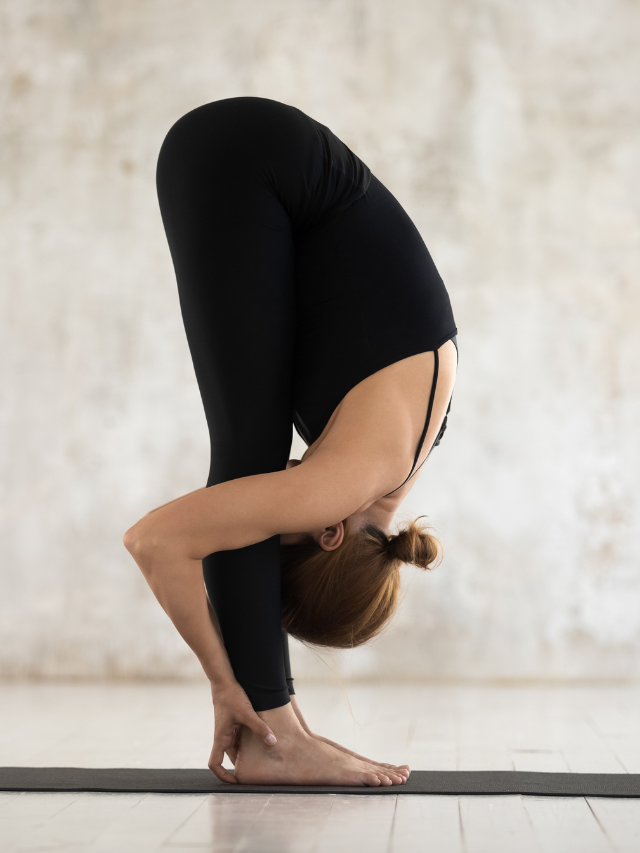
How To Do Forward Bend Pose
- Stand up straight with your feet hip-width apart.
- Take a deep breath in.
- As you exhale, bend forward from your hips.
- Keep your back straight and let your arms hang down.
- Bend your knees slightly to avoid straining your back.
- Relax your neck and let your head hang.
- Hold for 30 seconds to 1 minute while breathing slowly.
- To come up, inhale, and slowly rise back to standing.
Muscles Worked
- Hamstrings
- Lower back
- Calves
- Spine
- Shoulders
- Abdominals
4. Plank Pose
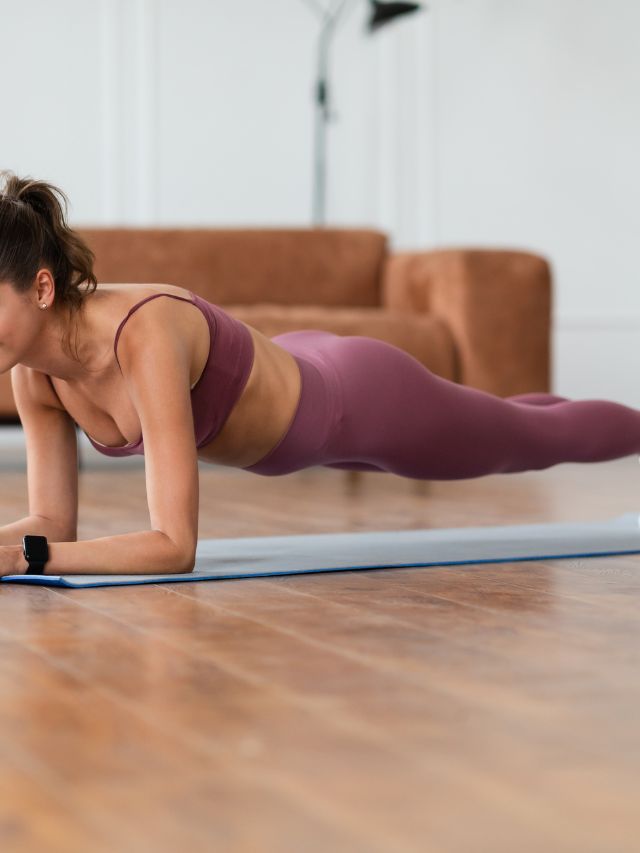
How To Do Plank Pose
- Start on your hands and knees.
- Step your feet back until your body forms a straight line from head to heels.
- Keep your hands directly under your shoulders with your fingers spread wide.
- Engage your core muscles to support your body.
- Hold this position for as long as you can, aiming for 20-30 seconds to start.
- Keep your neck and spine neutral, and avoid sagging or arching.
- Breathe deeply and steadily throughout the pose.
- To release, gently lower your knees to the ground.
Muscles Worked
- Core Muscles: Abdomen and lower back
- Arm Muscles
- Shoulder Muscles
- Leg Muscles
5. Bow Pose
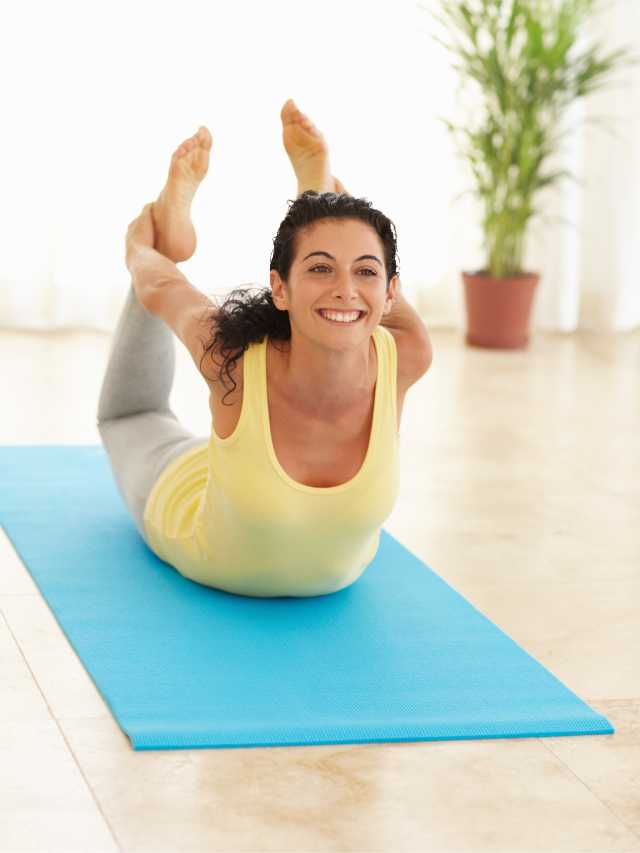
How To Do Bow Pose
- Lie on your stomach on a yoga mat or soft surface.
- Keep your arms alongside your body, palms facing up.
- Bend your knees and bring your heels towards your buttocks, keeping them hip-width apart.
- Reach back with your hands and grasp your ankles.
- Inhale deeply and lift your chest and thighs off the mat by pressing your feet into your hands.
- Keep your gaze forward and your neck in a neutral position.
- Lift your thighs as high as you can while simultaneously lifting your chest and upper body.
- Keep your shoulders relaxed and away from your ears.
- Hold the pose for 20-30 seconds, breathing deeply and evenly.
- To release, exhale and gently lower your chest and thighs back down to the mat.
- Extend your legs and relax in Corpse Pose (Shavasana) for a few breaths.
Muscles Worked
- Back
- Shoulder And Chest
- Thighs
- Hips
6. Bound Angle Pose
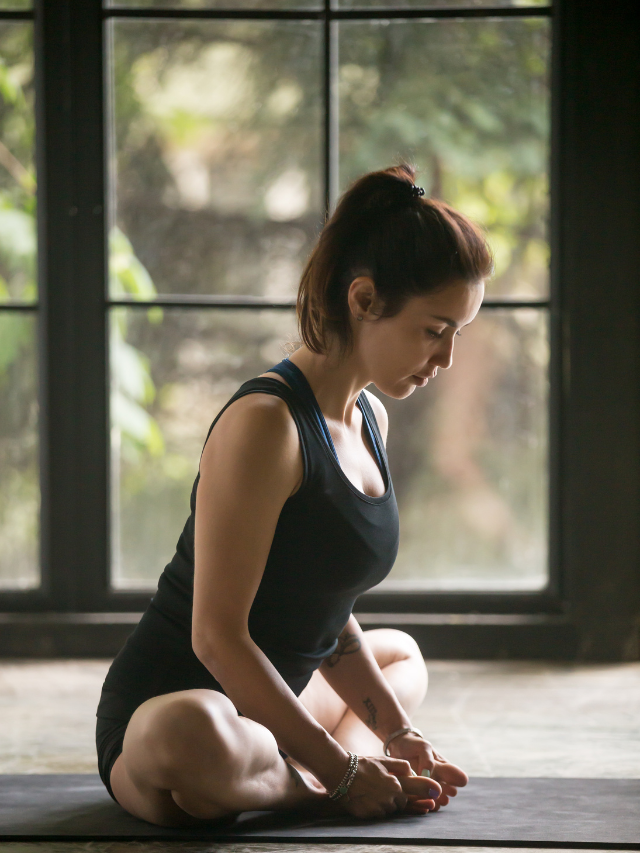
How To Do Bound Angle Pose
- Sit down with your legs straight out.
- Bend your knees and bring your feet together, letting your knees fall out to the sides.
- Hold onto your feet with your hands.
- Sit up tall and relax your shoulders.
- Gently press your knees towards the floor.
- Breathe deeply and stay in this position for a bit.
- When you’re ready, release and straighten your legs.
- Repeat as needed for a good stretch in your inner thighs and groin.
Muscles Worked
- Adductor muscles
- Groin muscles
- Core muscles
- Lower back muscles
- Shoulder muscles
7. Mountain Pose
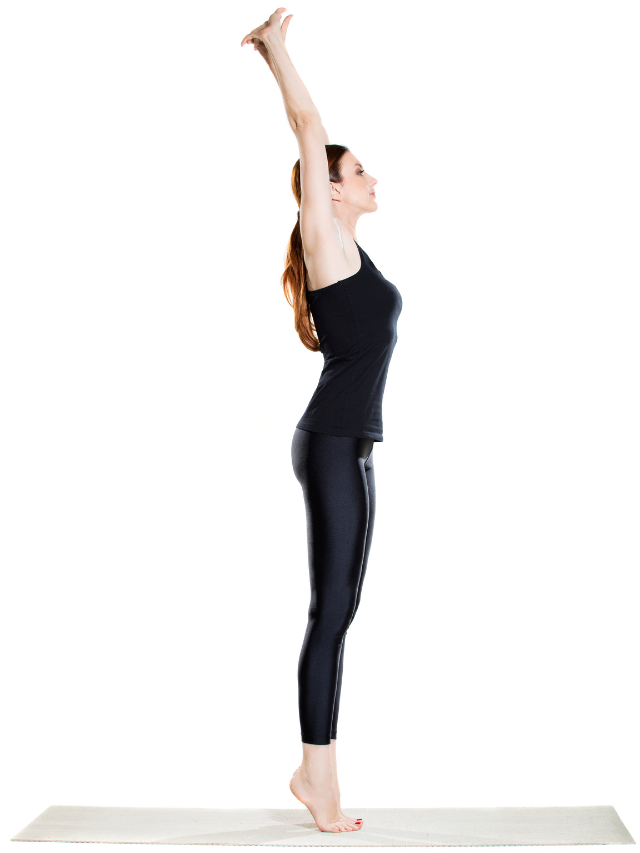
How To Do Mountain Pose
- Stand tall with your feet together.
- Keep your arms relaxed by your sides.
- Straighten your spine and engage your leg muscles.
- Roll your shoulders back and down.
- Take a deep breath and feel strong and steady.
- Hold for a few breaths, feeling like a mountain.
- Relax and repeat as needed for grounding and stability.
Muscles Worked
- Quadriceps
- Hamstrings
- Gluteal muscles
- Core muscles
- Shoulder muscles
- Neck muscles
- Muscles along the spine
8. Raised Arms Pose
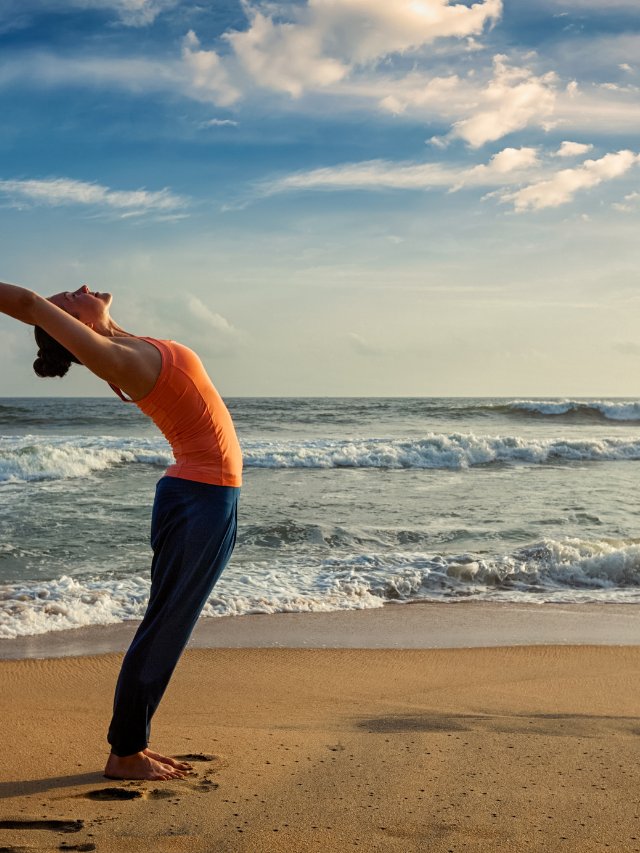
How To Do Raise Arms Pose
- Stand up straight with your feet apart.
- Take a deep breath and lift your arms above your head.
- Keep your arms straight and your palms facing each other.
- Stretch upward as if you’re trying to touch the sky.
- Hold for a moment, feeling the stretch in your sides.
- Breathe slowly and deeply.
- Lower your arms and relax.
- Repeat as needed for a gentle stretch and to feel energized.
Muscles Worked
- Shoulders
- Upper Back
- Back
- Core
- Arms
9. Malasana (Garland Pose)
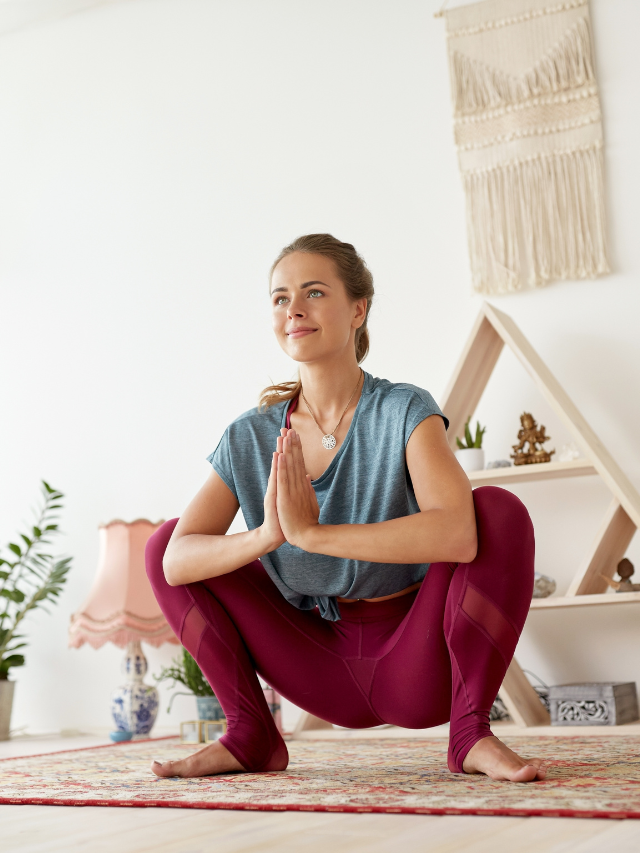
How To Do Malasana (Garland Pose)
- Stand with your feet apart.
- Bend your knees and lower into a squat.
- Keep your heels down or lift them slightly.
- Join your palms together at your chest.
- Stay for a few breaths, feeling the stretch.
- Straighten up to stand again.
- Repeat for a good hip and groin stretch.
Muscles Worked
- Quadriceps (front thigh muscles)
- Adductors (inner thigh muscles)
- Gluteus(buttocks)
- Calves
- Core muscles
Read More: 11 Yoga Asanas For Healthy Life
10. Triangle Pose
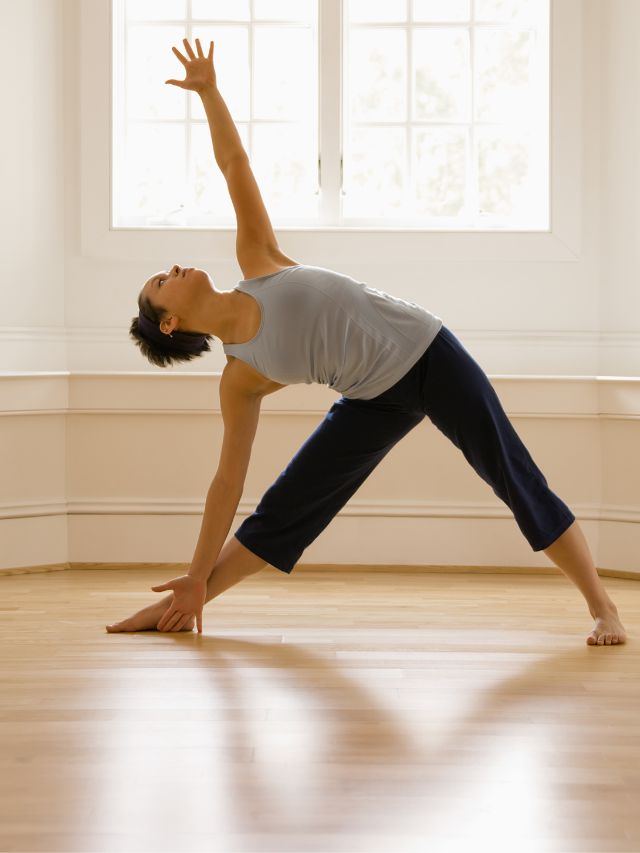
How To Do Triangle Pose
- Stand with feet wide apart.
- Turn right foot out, left foot slightly in.
- Stretch arms out to the sides.
- Reach right hand down to the shin, ankle, or floor.
- Extend left arm up, and look up.
- Hold for a few breaths.
- Switch sides.
Muscles Worked
- Legs
- Core Muscles
- Side Body
- Shoulders and Arms
11. Chair Pose
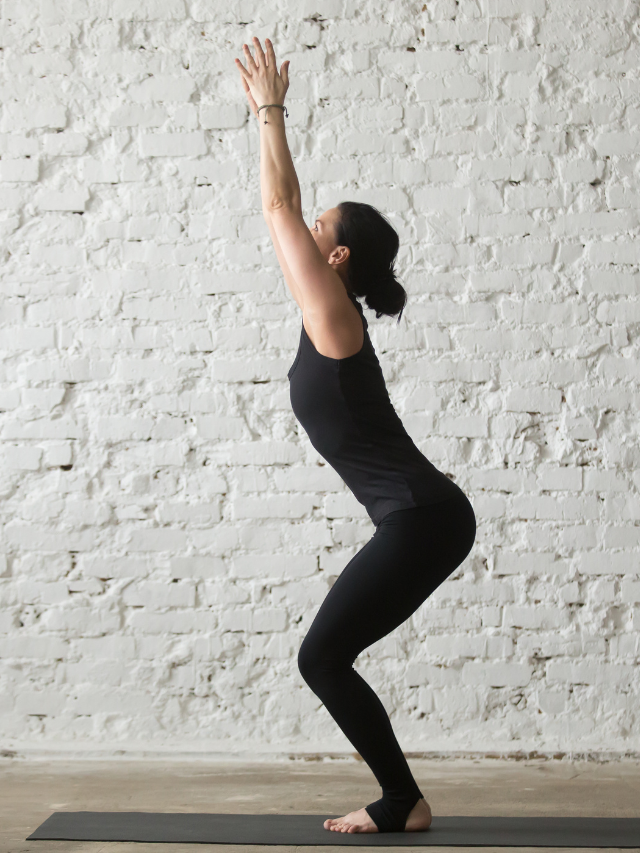
How To Do Chair Pose
- Stand with your feet hip-width apart.
- Inhale, raise your arms overhead.
- Exhale, bend your knees like you’re sitting in a chair.
- Keep your back straight, chest lifted.
- Hold for a few breaths.
- Inhale, straighten your legs and arms up.
- Exhale, lower your arms, and return to standing.
Muscles Worked
- Quadriceps
- Glutes
- Hamstrings
- Calves
- Core Muscles
12. Child Pose
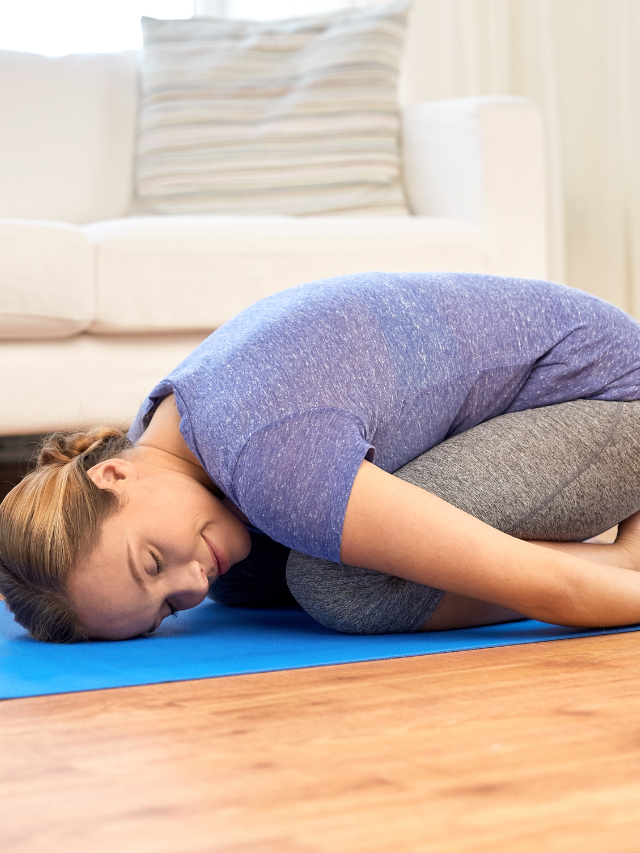
How To Do Child’s Pose
- Start by kneeling on your yoga mat with your knees hip-width apart.
- Sit back on your heels and bring your big toes together, allowing your knees to widen slightly.
- Exhale and lower your torso forward, resting your forehead on the mat.
- Extend your arms forward or alongside your body, palms facing up, and relax your shoulders.
- Allow your chest to rest on or between your thighs, and let your belly soften as you breathe deeply.
- Press your hips back towards your heels to deepen the stretch in your lower back and hips.
- Hold the pose for 1 to 3 minutes, or longer if comfortable, breathing deeply and surrendering to the pose.
- To release, gently walk your hands back towards your body and slowly roll up to a seated position.
Muscles Worked
- Back
- Shoulders
- Hips
- Thighs And Legs
Frequently Asked Questions
Q1. Can yoga help with joint pain?
Ans. Yes, yoga can help joint pain! It stretches joints gently, which can improve flexibility and reduce stiffness.
Q2. What are the best yoga poses for joint pain?
Ans. The best yoga poses for joint pain are:
1. Gentle Forward Bends: These poses can help stretch and lengthen the muscles around the joints, improving flexibility and reducing pain. Examples include Uttanasana (Standing Forward Bend) and Upavistha Konasana (Wide-Angled Seated Forward Bend).
2. Warrior Poses: Warrior poses (Virabhadrasana) strengthen the legs and core, which can help stabilize and support the joints.
3. Seated Spinal Twists: These poses improve spinal mobility and can help relieve pain in the back and hips.
4. Plank Pose: While not directly targeting joints, Plank Pose strengthens the entire body, which can improve joint stability and reduce pain.
Q3. Does Yoga lubricate joints?
Ans. No, yoga doesn’t directly lubricate your joints. However, yoga can improve how synovial fluid moves within your joints. By gently moving your joints through various poses, yoga helps circulate the existing synovial fluid
Q4. Which pranayama is best for joint pain?
Ans. According to Swami Ramdev, breathing exercises called pranayamas can improve blood flow throughout your body. This helps keep your organs functioning well. He recommends starting your day with sun salutations (surya namaskar) followed by specific pranayamas like Kapalbhati, Anulom Vilom, and Bhastrika for the best results
Conclusion
Yoga is effective and essential for health and personal well-being, simple yoga routine makes a huge difference in your life and makes your life happy and free from illness. Yoga poses, mudars, and breathing techniques can address your problems effectively, it concentrate on the over human system body, organs, bones, joints, emotions, and feelings.
The above-suggested yoga poses help your joints be strong and healthy. Yoga is a simple and impactful exercise with endless benefits, by practicing yoga in your daily routine can help you in healthy bones and muscles and strong joints, it will improve joint movement and flexibility.
If you have any questions or suggestions, please comment down below, we will pleased to answer all your queries. Thank you!
About The Author

Honey is a certified yoga instructor with training from Patanjali Yogpeeth, Haridwar. With four years of dedicated teaching experience, she specializes in using yoga to improve spinal health, build core strength, and help people find relief from chronic pain. Her mission is to make the transformative power of yoga accessible to everyone.

